
How to Burn Photos to DVD
Share or Preserve your Photos on Discs

In our digital age creating copies or keeping information on DVDs is a part of a natural cycle of knowledge and experience. DVDs can be played in many types of players, and they offer a high storage capacity. So, for example, if you spent great holidays in India and you want to show your grandparents the photos you took there, but they don’t have a computer and the only thing they’ve got is an old DVD player and a TV, you’ll need to burn the photos to DVD. Or in case you were the photographer during the graduation party and you want to gift your classmates or teachers with a graduation slideshow, you’ll need to put it on DVD.
So how do we get started? You’ve inserted a writeable DVD into your computer's recorder, right? Now try to remember the awkward and sleepy moments you spent with your family or friends when they were so eager to show you all the three hundred and something pictures of how their kitty and doggy got acquainted and the new carpet in the guest room was almost destroyed as a result. A bit boring, isn’t it? A better idea is creating a music slideshow with photos that will be attractive and not a bit drowsy.
Step 1 – prepare the ingredients
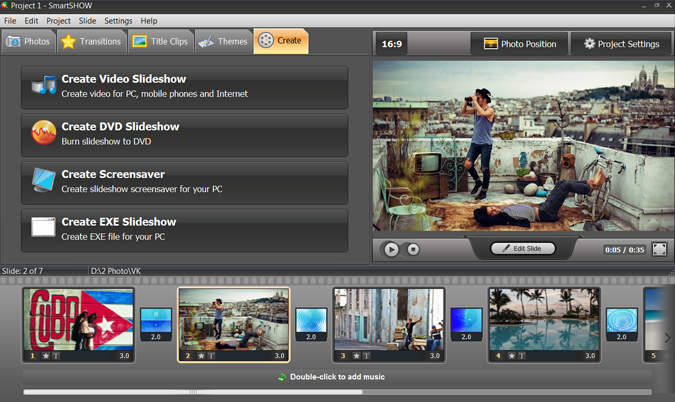
Open a slideshow program such as SmartSHOW software that will be your guide throughout creating a photo DVD. After you have chosen the pictures and put them into the timeline, you can add slide transitions, music, and a decoration theme. When the slideshow is ready, move on to the Create tab and click the Create DVD Slideshow button.
Step 2 – mix slideshows and videos
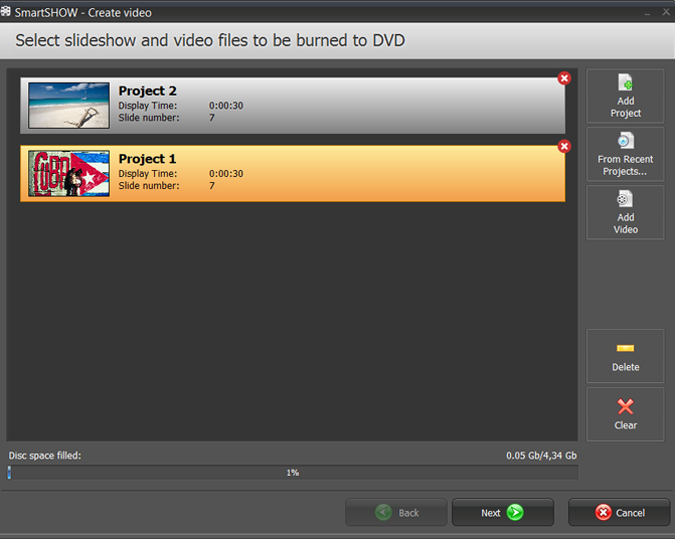
And now you are able to transfigure your project into a professional DVD. When you plan to burn photos to DVD, you often have some video files that you want to put there too. SmartSHOW allows you to put several slideshow projects and video files onto one disc – just make sure the disc space permits it.
Step 3 – add a bit of creative spark
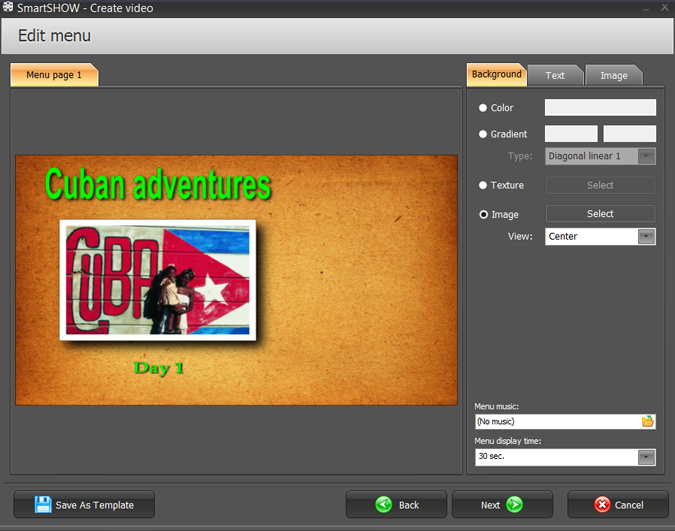
When you are creating a photo DVD for your family or clients and want a refined and stylish look, take advantage of the menu designs. The design of a DVD menu prepares the viewer for the visual information that will come next. And it is very easy to deal with in SmartSHOW – just choose the design option you like. The background may contain a picture of a film stock, a scratched and retro-styled sheet of paper, flowers, ribbons, etc.
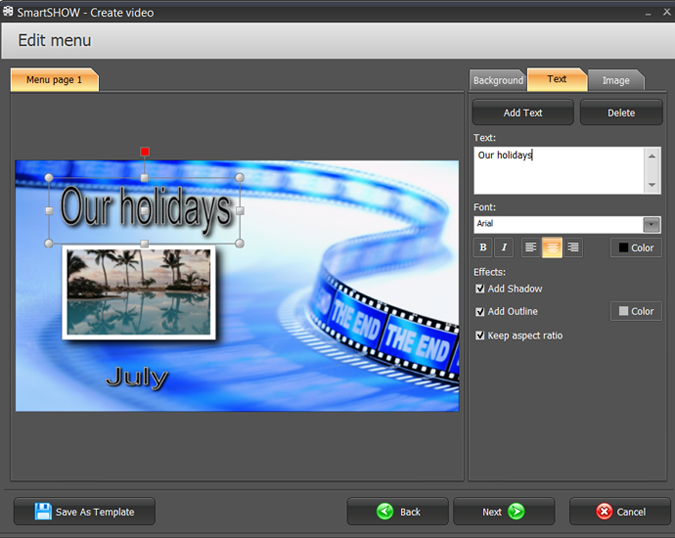
Step 4 – make the last arrangements
To make the navigation easy, choose the pictures that will work as chapters. The background music in the menu usually warms the viewer up for the demonstration. Menu display time is also a variable feature. Depending on how many projects you are putting on one DVD, the menu time will differ. The more projects – the more time it takes to read the menu and make a choice. Do not forget to think of a title for the slideshow and to write the title in the menu. That will be a simple reminder in case you mix up some discs and covers one day.
Step 5 – bake it correctly
When the decoration stage is covered you are coming up to a more technical one. That’s the moment when you choose the DVD drive or the output folder. Depending on the storage capacity of the disc you can choose different quality for the exported slideshow. Of course, the better the quality, the less details you lose. But you should always remember that the highest quality takes more space.
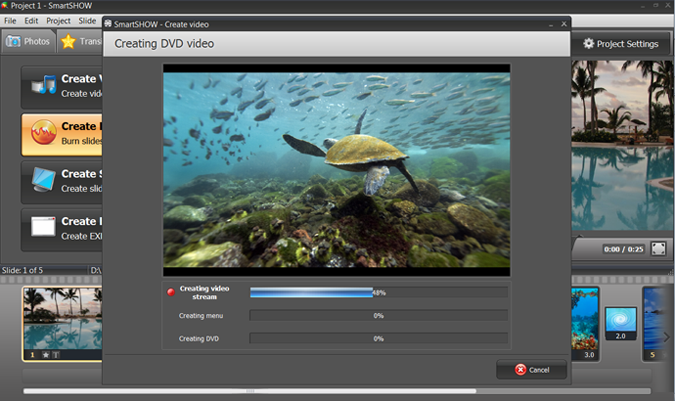
That’s all, you’ve done it! The program starts processing and you can watch how it is going. There is also a special option that creates a DVD folder or an ISO image if you wish to burn the photos to DVD later.
Not always do we have Internet or a computer nearby. In this case it is vital to have a DVD shelf that will keep your memories and emotions. Package the discs creatively and share them with your dearest ones!
Try SmartSHOW!
Want to make stunning photo movies with your own pictures? That's as simple as ABC with Smart Slideshow Maker, and you can try it right now!
COMPATIBLE WITH
Windows 11, 10, 8, 7
OUR CUSTOMERS SAY: